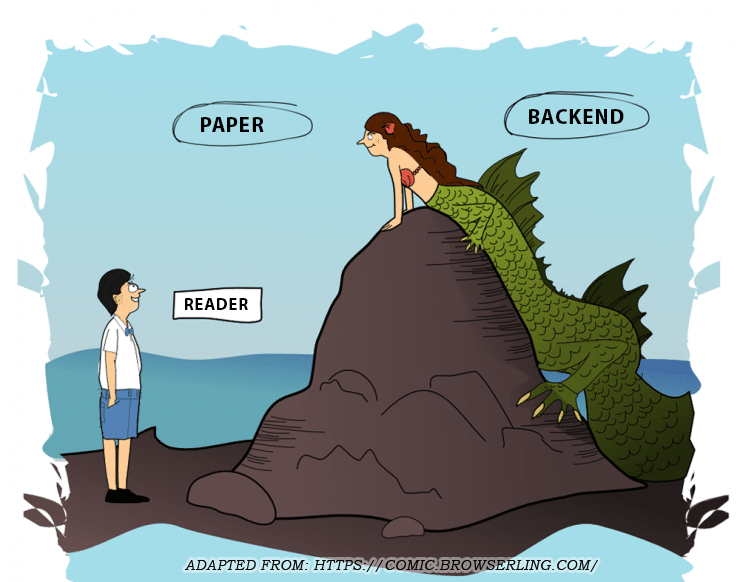
Everyone is familiar with the importance of delivering a paper that is written in a clean and organized way. However, the same thing can often not be said about the way that we organize and maintain the code and data used in the backend (i.e. code and data layer) of a project. This part of a project is usually not visible and good intentions to keep it organized tend to be one of the first things to fly out the window when a submission deadline is approaching. While understandable, I consider this to be an area with a lot of room for improvement. We spend the large majority of our time interacting with this part of the project and we can save ourselves a lot of time and frustration if we keep it clean and organized!

In this blog series, I will describe and share some of the best practices that I have copied, adapted, and developed over the years to keep my research and coding projects organized. Admittedly, I do not have any more credentials to talk about this topic than anyone else. However, I considered there to be a lack of best practices that are oriented towards being easy to use and implement, while still being effective in keeping things organized. This series of blog posts is, therefore, aimed to provide a starting point for such best practices. I hope to make this a community driven endeavor, so if you have additional tips or suggestions please share them by either commenting or by sending me an email so that I can consolidate and add them!
Part 1: folder structure
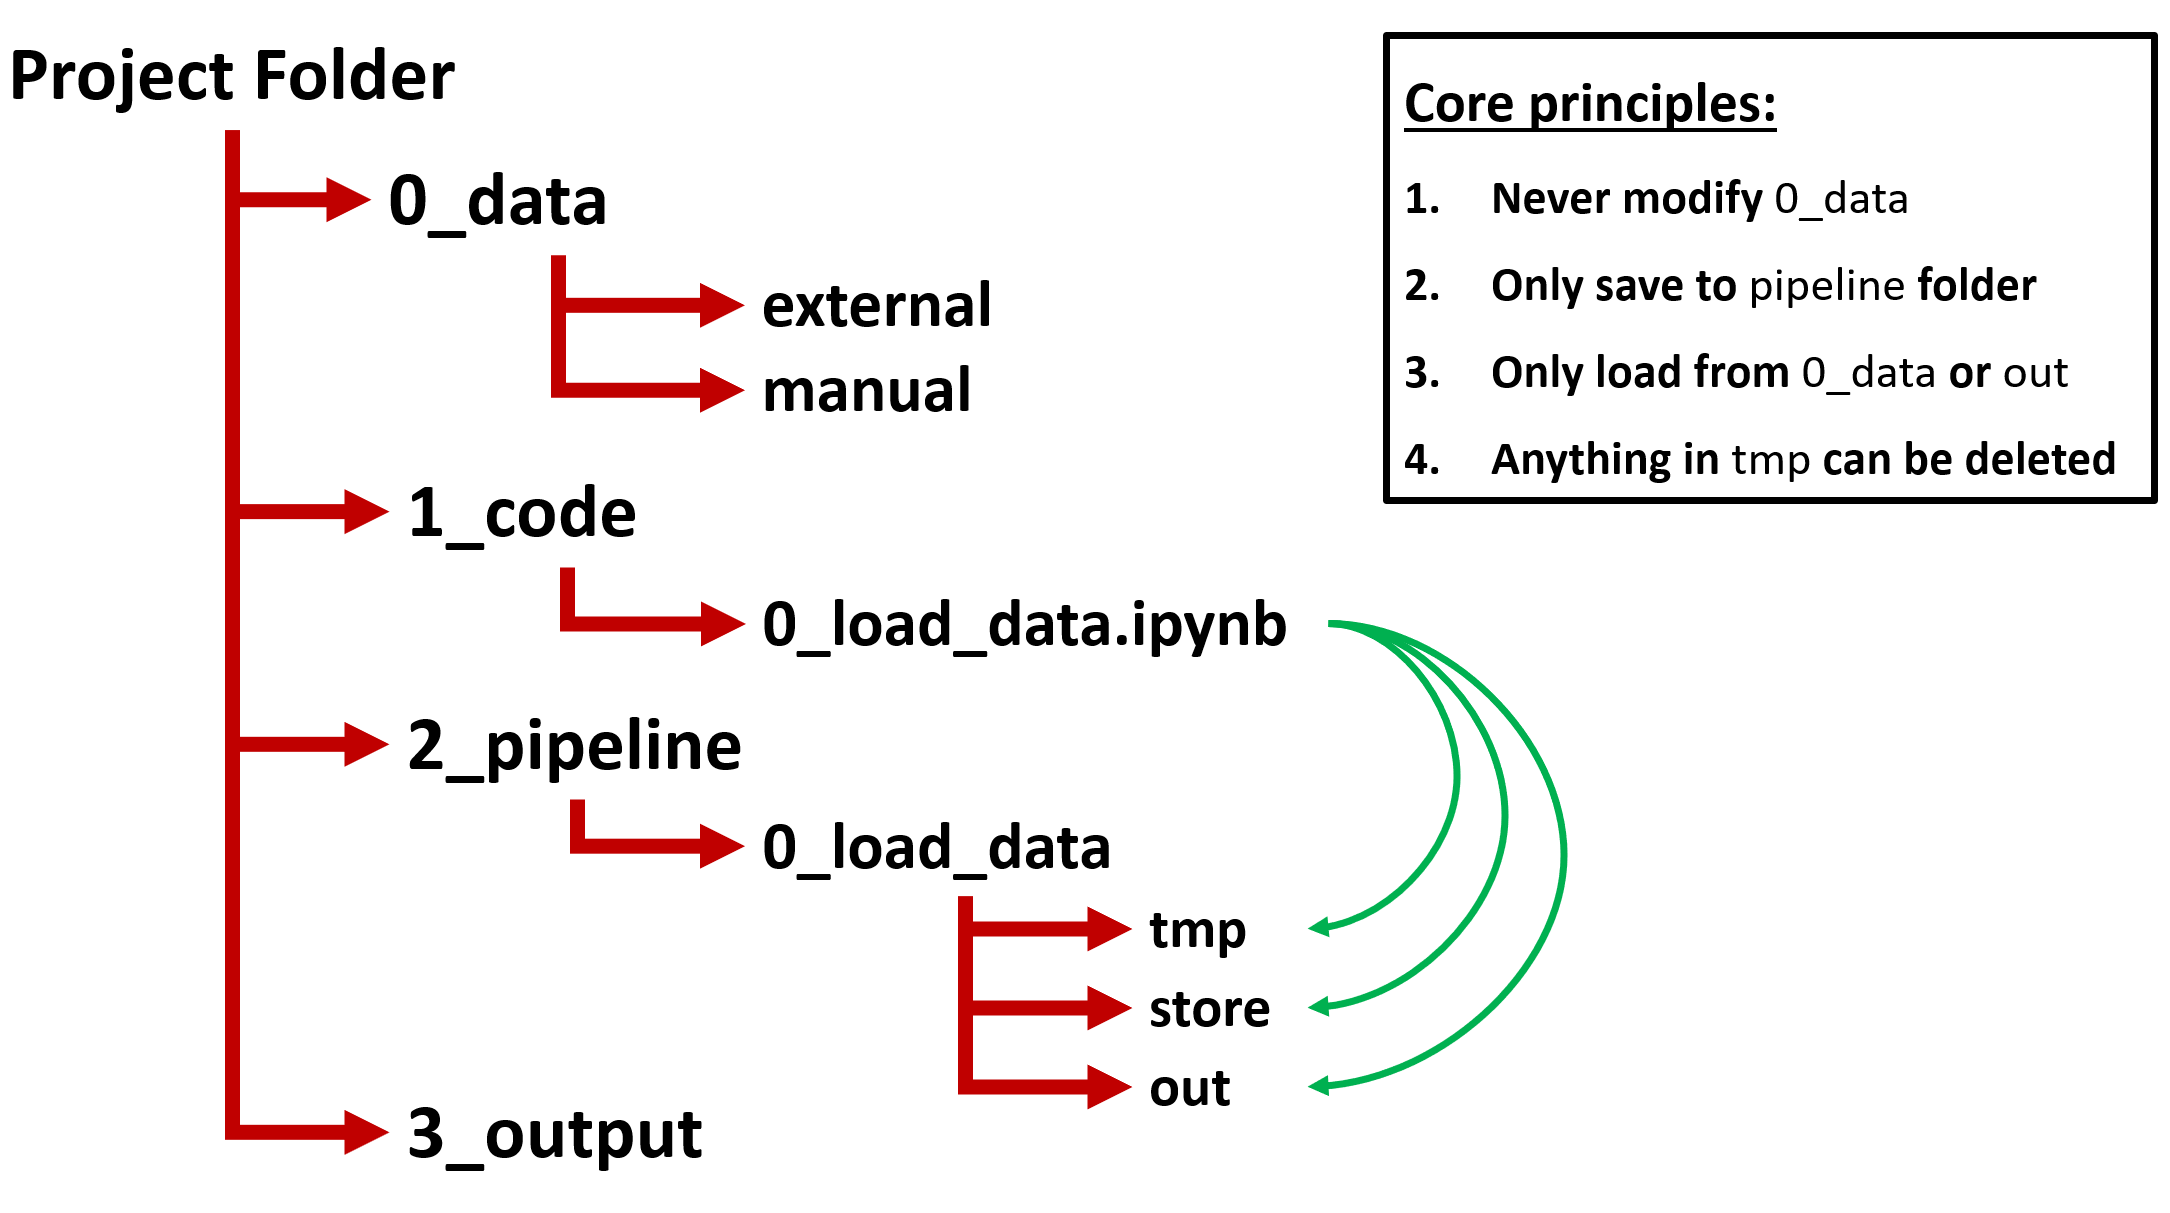
The first topic that I want to kick off with is the organization of files and folders. Starting your project with the right folder structure, even before writing your first line of code, can provide an easy and relatively unobtrusive way to stay organized. A good starting point is the guide by Matthew Gentzkow and Jesse Shapiro titled “Code and Data for the Social Sciences: A Practitioner’s Guide”. They describe various core “rules” that are worth giving a read. However, their practical recommendations have, at least for me, never really managed to solve my organization problem. But it serves as a good starting point! Based on their basic principles I have developed an adapted version of their directory structure that is more comprehensive while still remaining intuitive and easy to use. It is graphically represented in the figure below:

The main idea behind this folder structure is that you have a top-level project folder which contains 4 sub-folders: 0_data, 1_code, 2_pipeline, and 3_output. I will describe each folder in more detail below:
0_data contains all the input data that is either retrieved from external sources or created manually. For example, this includes data downloaded from databases such as Compustat, but also an Excel sheet with data that you manually classified. The core principle here is that nothing in this folder should ever be modified. The data in this folder should remain identical to the way that you have retrieved or manually created it.
1_code contains all your code files. This includes, for example, code files for Python, Stata, R, or SAS (or a combination thereof). Furthermore, I recommend to name your code files starting with a number to indicate the order of execution. This makes it obvious in what order files should be executed (which you could also further formalize in a .bat / .sh file if you wanted to).
2_pipeline contains a separate sub-folder for each code file included in the 1_code folder, they correspond based on the name (minus the file extension). This implies, for example, that a code file “0_load_data.ipynb” in 1_code would have a sub-folder in the 2_pipeline folder with the name “0_load_data”. The main idea is that all output generated by a code file ends up in their corresponding pipeline folder. This makes it very easy to understand how data is flowing between code files as the data location indicates where it was generated. To further organize the generated outputs, I advise the following folders in each sub-folder: out, store, and tmp.
2_pipeline -> sub-folder -> out contains files that you save with the intention of loading them in a future code file. These are usually the “end-products” of the current code file.
2_pipeline -> sub-folder -> store contains files that you save with the intention of loading them in the current code file. This is, for example, used in scenarios where it takes a while to run parts of your code and to avoid having to re-run these parts every time you might want to intermittently save the progress of your generated data to the store folder.
2_pipeline -> sub-folder -> tmp contains files that you save for inspection purposes or some other temporary reason. The basic principle is that you should not have to worry about anything in the tmp folder being deleted as it only serves a temporary purpose.
There are also a couple of additional principles that are worth mentioning:
If you follow this folder structure anyone should be able to easily tell what the original data is, how the code should be executed, and how the data flows between the different code files. This is not only beneficial for others trying to use or replicate your code, but it is also a tremendous time-saver when you need to interact with your code after not having worked on it for a while.
But wait, there is more!
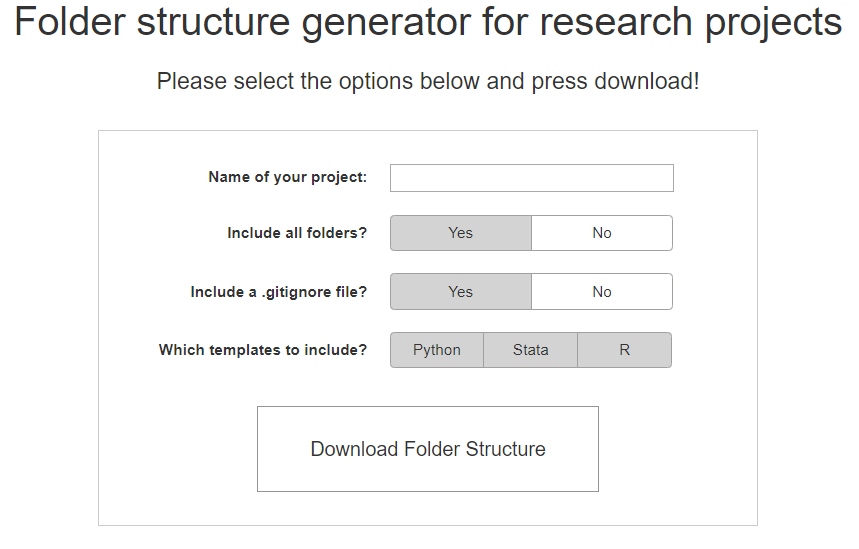
As I mentioned earlier, it is important to start using such a folder structure from the very beginning of a project. However, I completely understand that in the midst of enthusiastically starting a new research project it is not very appealing to have to deal with the creation of all these folders. Fortunately, I created a solution for this problem! Using my online tool you can, after selecting some basic options, simply download a zip file with the entire directory structure already setup for you. Just extract this folder to the desired location and you are good to go!

Available online at: https://www.tiesdekok.com/folder-structure-generator
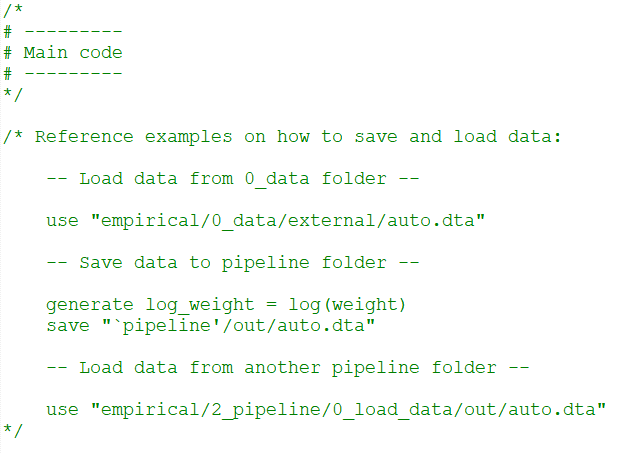
I have also included started templates for Python (both .py files and notebooks), Stata, and R code that deal with changing the working directory to the project folder and creating the pipeline folders. All you need to do is copy the template file you need to the 1_code folder and renaming it to whatever you intend to do with that file. If you then, in the code file, modify the NAME parameter (and if you use Stata / R also the PROJECT_DIR parameter) and run the code it will automatically check whether a corresponding pipeline folder exists and if not generate it for you. It also provides a “pipeline” variable specific to that code folder so that you can easily refer to it when saving files. Each template file also contains reference examples on how to load and save data, for example:

I hope this was an interesting read and if you have comments, remarks, or suggestions please let me know by commenting below or by sending me an email!
Online tool available at: https://www.tiesdekok.com/folder-structure-generator
(This article is originally published on TowardsDataScience.com, link)